How to Install Your Replacement Seat Covers
Disclaimer: This blog is intended as a general guide to seat cover installation. Vehicle models can differ, and certain features may not be addressed here. For seats with airbags, power controls, or integrated heating elements that require transfer, we recommend installation by a professional.
Installing new seat covers is more than a DIY project, it’s a way to bring your car back to life. Whether you’re restoring a well-loved ride or simply freshening up the interior, this guide walks you through the process step by step. We’ll cover everything from the tools you’ll need to common mistakes to avoid, and even when it’s best to call in a professional.
At United Seat Factory, we design our seat covers to match your car’s original fit, color, and stitching. Installation requires some effort, but it’s absolutely doable with the right tools, a bit of patience, and some experience.
Install Your Replacement Seat Covers Like a Pro (Even If You’re Not One!)
What You’ll Need: Tools & Prep
Before you begin, gather your tools and set up a clean, well-lit workspace. A garage, driveway, or even a shaded outdoor area can work well, just make sure you have room to move and good lighting to see the details.
Essential Tools:
- Socket wrench or impact driver (10–15mm sockets for most seats)
- Safety gloves and glasses
- Plastic pry tools (for trim removal)
- Flathead screwdriver or metal pry tool (for clips)
- Hog ring pliers and hog rings (if applicable)
- Cutting pliers
- Utility knife or sharp scissors
- Spray glue (if you need to transfer the heater from your old cover or repair the seat foams)
- Fabric marker or chalk (for trimming)
- Zip ties (as backup fasteners)
- Small containers or labeled bags (for bolts and clips)
- Steamer or heat gun (for wrinkles)
Pro Tips Before You Start:
- Turn off your car and take out the key from the ignition.
- Important: Disconnect your car battery before removing seats, especially if your seats have airbags or power controls. Safety first.
- Take “before” photos of your seats from multiple angles. These will help during reassembly and ensure you don’t miss any details. Remove all personal items from the car and clear the area around the seats. Give yourself space to work comfortably.
- Lay down a soft blanket or mat to protect the seat and your workspace from scratches or dirt.
Step-by-Step Installation Guide
Step 1: Remove the Seat from the Vehicle
- Slide the seat all the way back to access the front bolts. Remove them using your socket wrench.
- Slide the seat forward to access and remove the rear bolts.
- Tilt the seat gently to locate and disconnect any wiring: airbags, heaters, lumbar support, or power controls.
- Take photos of each connection before unplugging. These will be your reference when reinstalling.
- Carefully lift the seat out and place it on a stable surface. If it’s heavy, ask for help, don’t risk injury.
Step 2: Remove the Old Seat Cover
- Use gloves and a flathead screwdriver to remove J-clips or fasteners holding the old cover in place.
- Peel the old cover off gently, starting from the sides and working inward. Be patient as some areas may be tightly secured.
- Identify how the cover is attached to the foam: Velcro, clips, or hog rings.
- Velcro: Peel slowly to avoid damaging the foam.
- Clips: Pry open carefully with plastic tools, and avoid damaging the clips.
- Hog rings: Use cutting pliers to detach. Save the rings if reusable, or replace them with new ones.
Step 3: Inspect the Foam Cushion
- Press down on the foam to test elasticity. If it springs back quickly, it’s in good shape.
- If it feels flat, brittle, or slow to rebound, consider steaming or replacing it.
- Our covers come with an extra layer of foam for added support and fit, but the base cushion still matters.
- Clean the foam surface with a vacuum or damp cloth to remove dust and debris before installing the new cover.
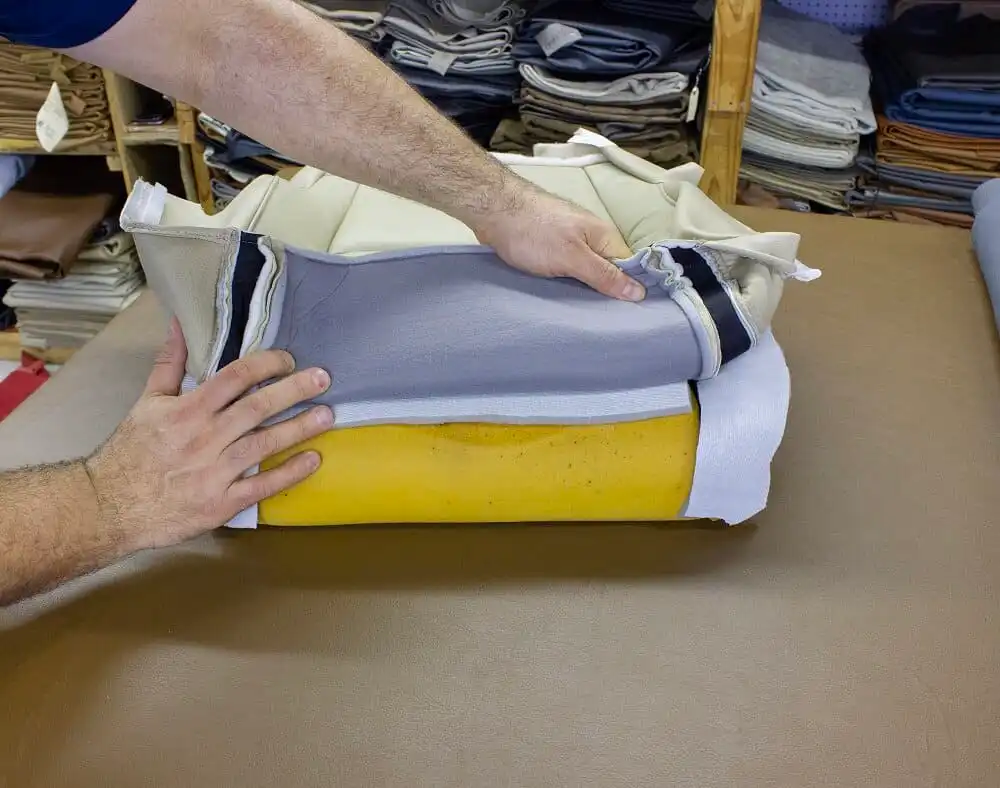
Step 4: Install the New Seat Cover
Attachment Methods:
- Velcro: Align and press firmly, starting from the center and working outward. Smooth as you go.
- Clips: Snap into place using the plastic strips and foam slots. Make sure each clip is fully engaged.
- Hog Rings: Use hog ring pliers to secure the cover to the seat rods. Space them evenly for a tight fit.
Take your time here. A snug, wrinkle-free fit depends on patience and precision. Don’t rush, this is where the magic happens!
Step 5: Reattach J-Clips and Secure the Cover
- Flip the seat over and tuck the cover into the frame.
- Start with the front center clip and work outward. This helps anchor the cover evenly.
- Use a rolling motion to engage each clip securely. If clips don’t fit perfectly, zip ties can be used as a reliable alternative.
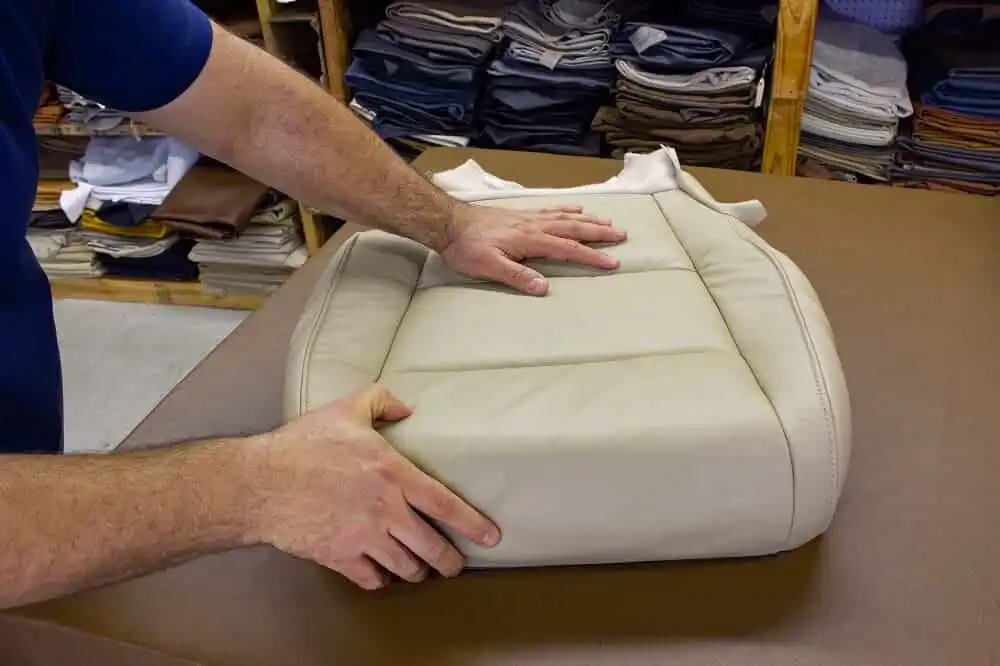
- Double-check that all edges are tucked in neatly and that the cover sits perfectly flat on the foam.
Step 6: Trim for Side Panels and Controls
- To ensure a perfect fit based on your seat’s layout, we don’t pre-cut access points for headrests, seat belts, or power controls. Once the cover is in place, use a fabric marker or chalk to outline the areas that need trimming, like seat controls, levers, or side panels, before making any cuts.
- Make small initial cuts and refine gradually. It’s easier to cut more than to undo a cut.
- Pass control wires through and reattach the side panel with screws. Ensure everything is aligned and functional.
Step 7: Smooth Out Wrinkles
- Massage the cover gently with your hands to release tension.
- Use a steamer to relax the material and remove creases. This is especially helpful for leather or vinyl.
- If needed, use a heat gun on low setting, but keep it moving to avoid damage. A hair dryer works too for light touch-ups.
- Let the seat rest for a few hours to allow the material to settle naturally.
Step 8: Reinstall the Seat
- With help, lower the seat back into the car. Be careful not to pinch wires or scratch trim.
- Reconnect all wires using your reference photos. Double-check airbag and power connections.
- Tighten all bolts securely and reattach the seatbelt.
- Return the seat to its upright position and test all functions: movement, heating, lumbar support, etc.
Step 9: Admire Your Work!
- Take “after” photos to celebrate the transformation.
- Compare with your “before” shots, you’ll see the difference immediately.
- Share your success story with us. We love seeing how our covers bring your car back to life.
Step 10: Aftercare Tips
- Wipe down seats regularly with a damp cloth. Avoid harsh cleaners or abrasive tools.
- Use leather conditioner or vinyl protectant every few months to maintain softness and color.
- Avoid prolonged exposure to direct sunlight. Use sunshades or park in the shade when possible.
- Inspect seams and fasteners occasionally to catch wear early. A quick fix now can prevent bigger issues later.
Common Mistakes to Avoid
Even seasoned DIYers can make a few missteps. Here are the most common ones, and how to avoid them:
- Forgetting to disconnect the battery: This can trigger airbag warnings or damage electrical systems.
- Rushing the removal process: Tugging too hard can tear foam or break clips.
- Cutting too much during trimming: Always start small and test fit before making final cuts.
- Skipping the wrinkle removal step: Wrinkles can affect fit and appearance, so take the time to smooth them out.
- Misplacing bolts or connectors: Use labeled containers or magnetic trays to keep everything organized.
When to Call a Professional
While many customers install their covers themselves, some situations need expert help:
- Seats with complex electronics or airbags
- Luxury vehicles with sensitive trim or upholstery
- If you’re short on time or prefer a guaranteed fit
We’re happy to guide you through the process or recommend a trusted installer in your area. Just reach out, we’re always happy to help.